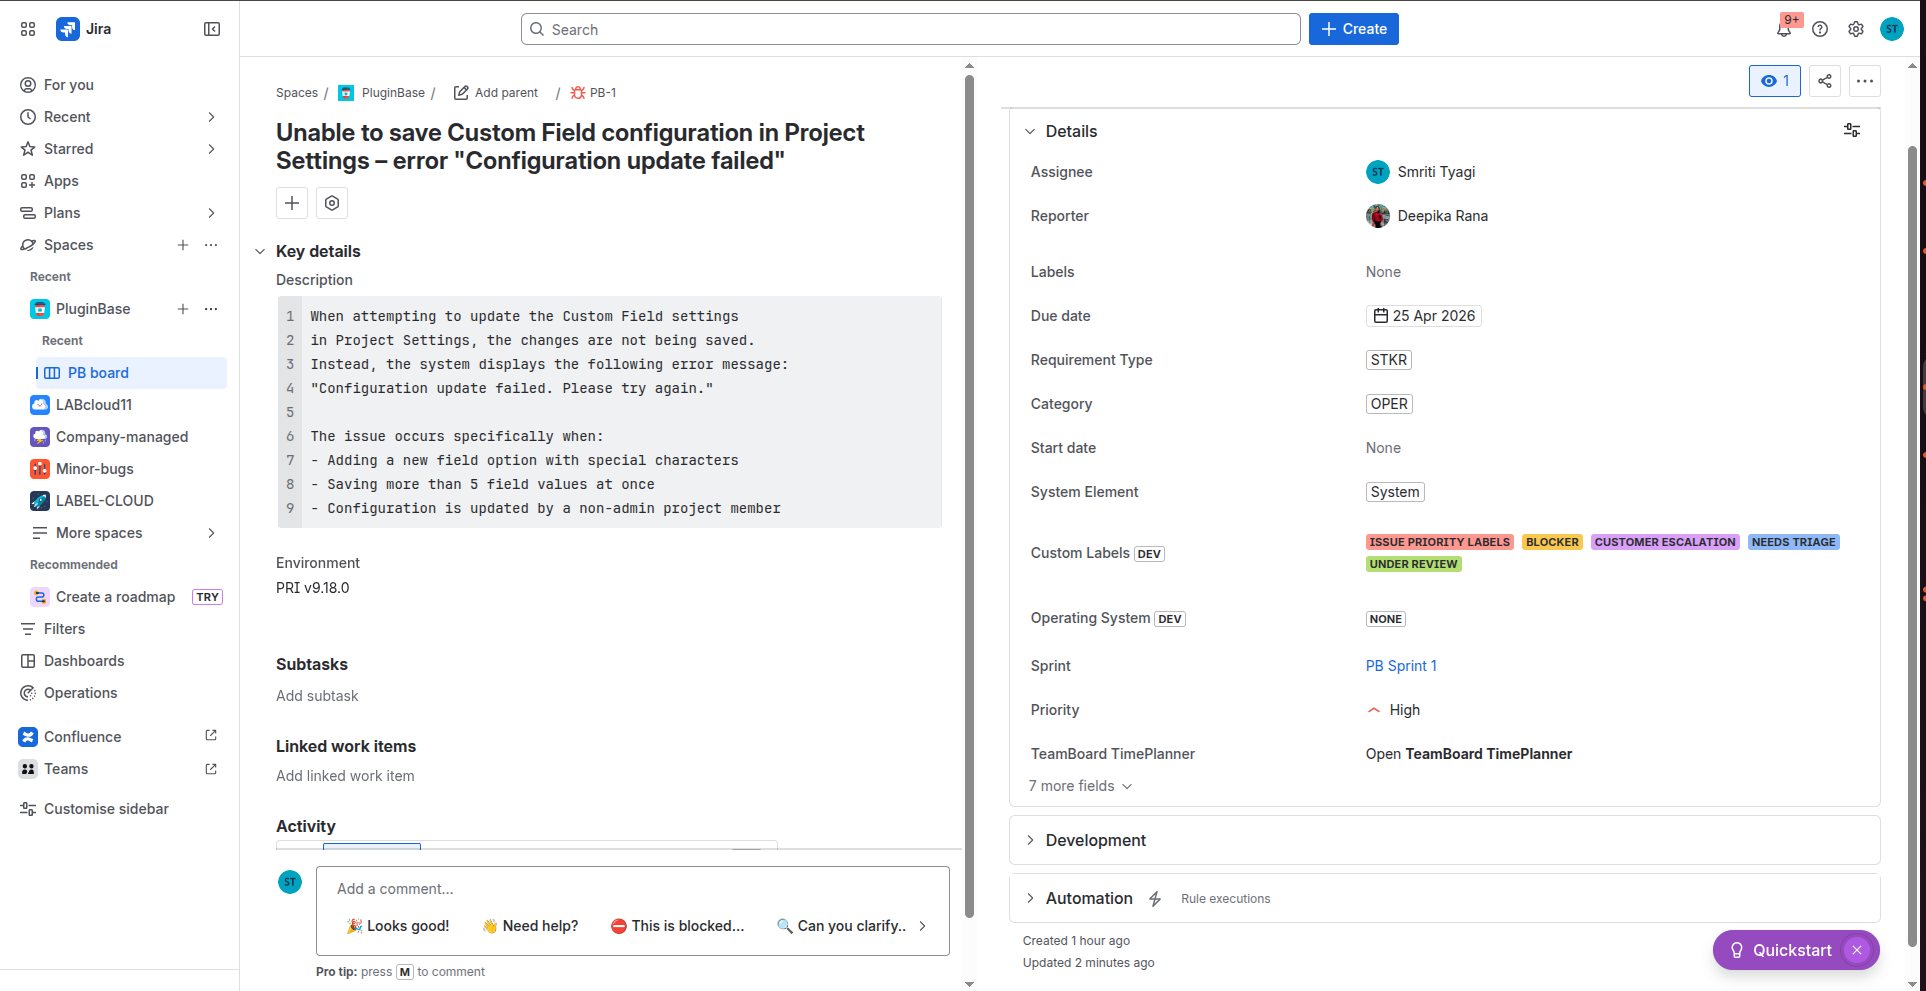
Vamhi Label Cloud is a Jira Cloud forge app that adds a new custom label field to your projects, giving your team colored, visually distinct labels for better issue categorization and at-a-glance identification.
Jira's built-in label field is limited to plain text with visual differentiation — but you cannot change label colors. Vamhi Label Cloud solves this by letting teams assign custom colors and styles to labels, and create multiple label fields within the same project.
Color-coding labels by team, priority tier, feature area, or lifecycle stage
Standardizing a project-level label library so all team members use consistent labels with consistent colors
Keep your labels organized by renaming, merging, or removing them across all project issues at once.
Tracking how many issues carry each label, without leaving the project settings screen
Role | Why they benefit |
|---|---|
Project Managers & Team Leads | Visual status signals across a board or backlog |
Project Admins | Maintaining a clean, consistent label structure |
Developers & Analysts | Filter or query issues by label with color-coded views |
ℹ️ Vamhi Label Cloud provides label analytics and reporting, Label App focuses on the management and presentation layer: creating, coloring, applying, and maintaining labels directly within Jira issues and project settings.
Task | Minimum permission required |
|---|---|
View colored labels on an issue | Any project member |
Apply labels to an issue |
|
Create, rename, delete, or merge labels |
|
Access project settings screen |
|
Jira Cloud (Jira Software or Jira Service Management)
The app must be installed from the Atlassian Marketplace by a Jira Administrator
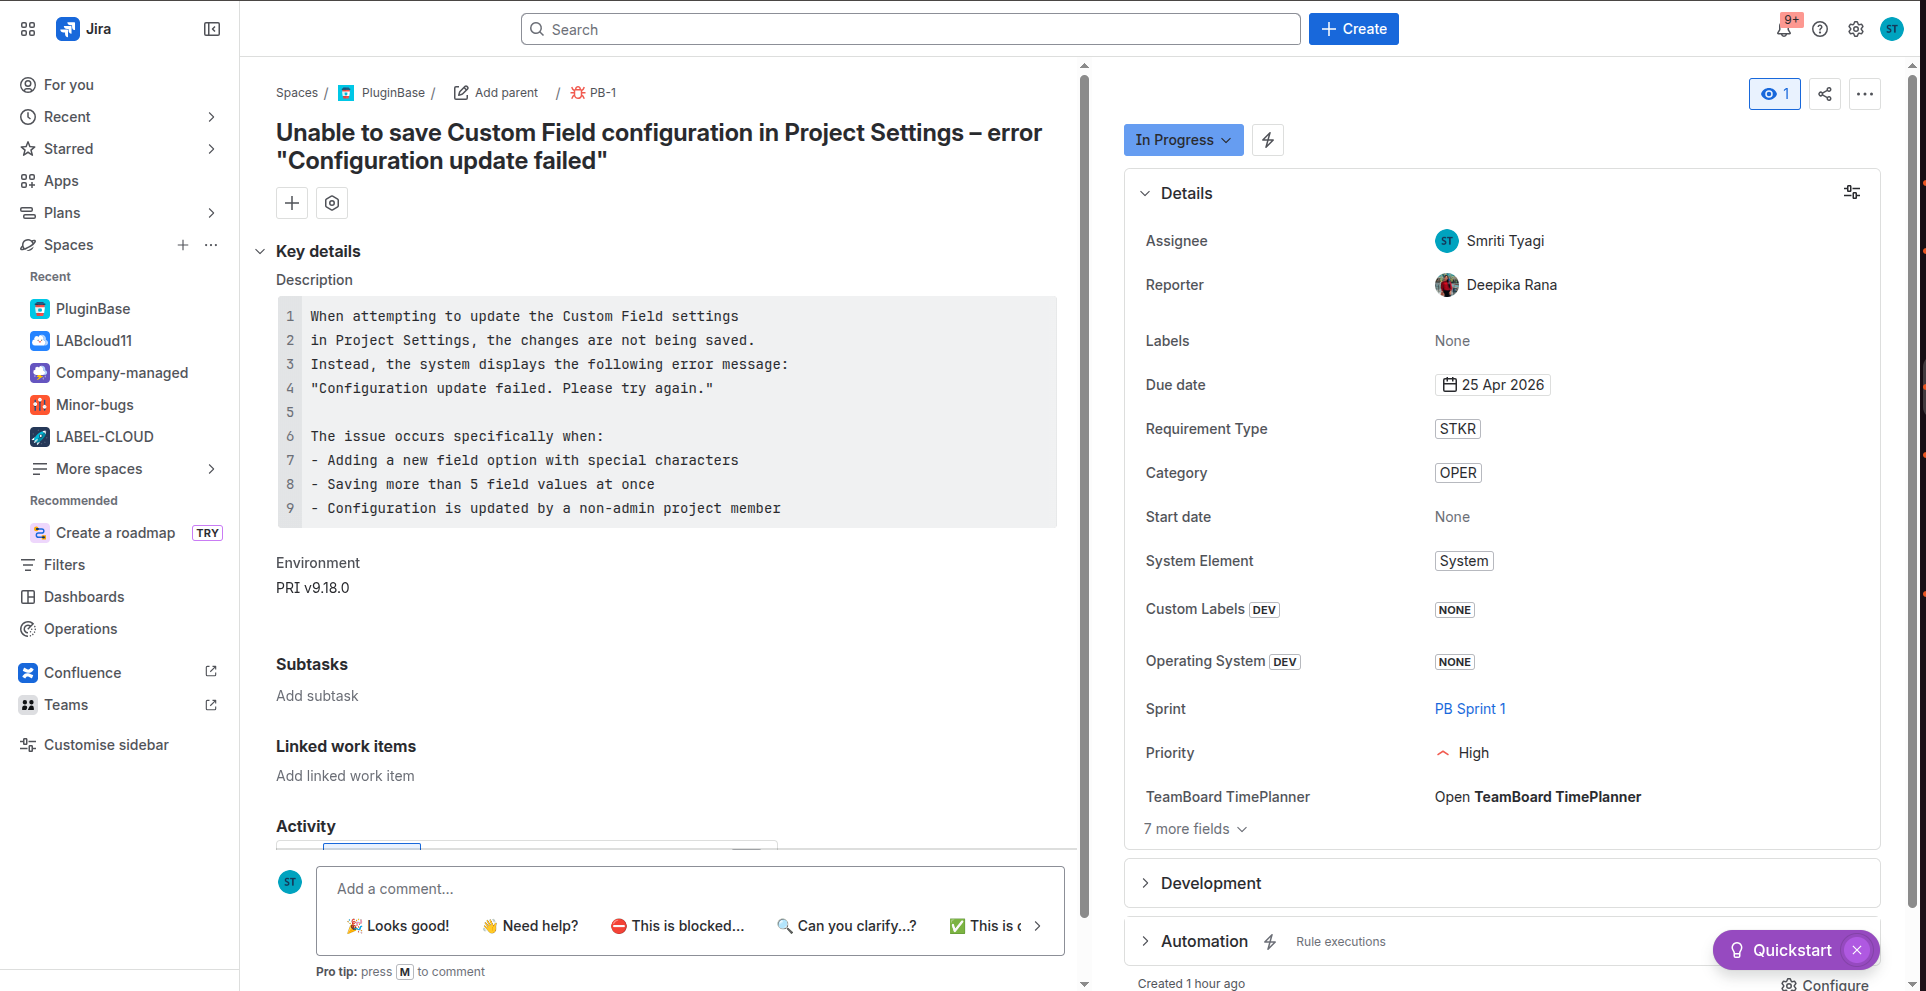
At least one Vamhi Colored Labels (Multi-select) custom field must be created and added to the relevant project screens before users can apply colored labels
Who: Project Admin or Jira Administrator Where: Project Settings → Vamhi Labels → Custom Fields tab
Option 1 – From Project Settings:
Select the custom field from the dropdown
Click + Create Label
Enter a label name (max 255 characters)
Choose a color from the palette
Choose a style: Solid or Light
Click Save
Option 2 – From an Issue:
Open any issue
Click the Custom Labels field
Type the label name
Click + Create "[name]"
Click Save
The label is now available for all users to apply to issues in this project.
⚠️ License note: Color and style selection requires an active license. Without one, labels are created with the default gray color.
Who: Any user with Edit Issues permission Where: Issue view → custom label field
Open any Jira issue in the project.
Find the custom label field (e.g., Team Labels) in the issue detail panel.
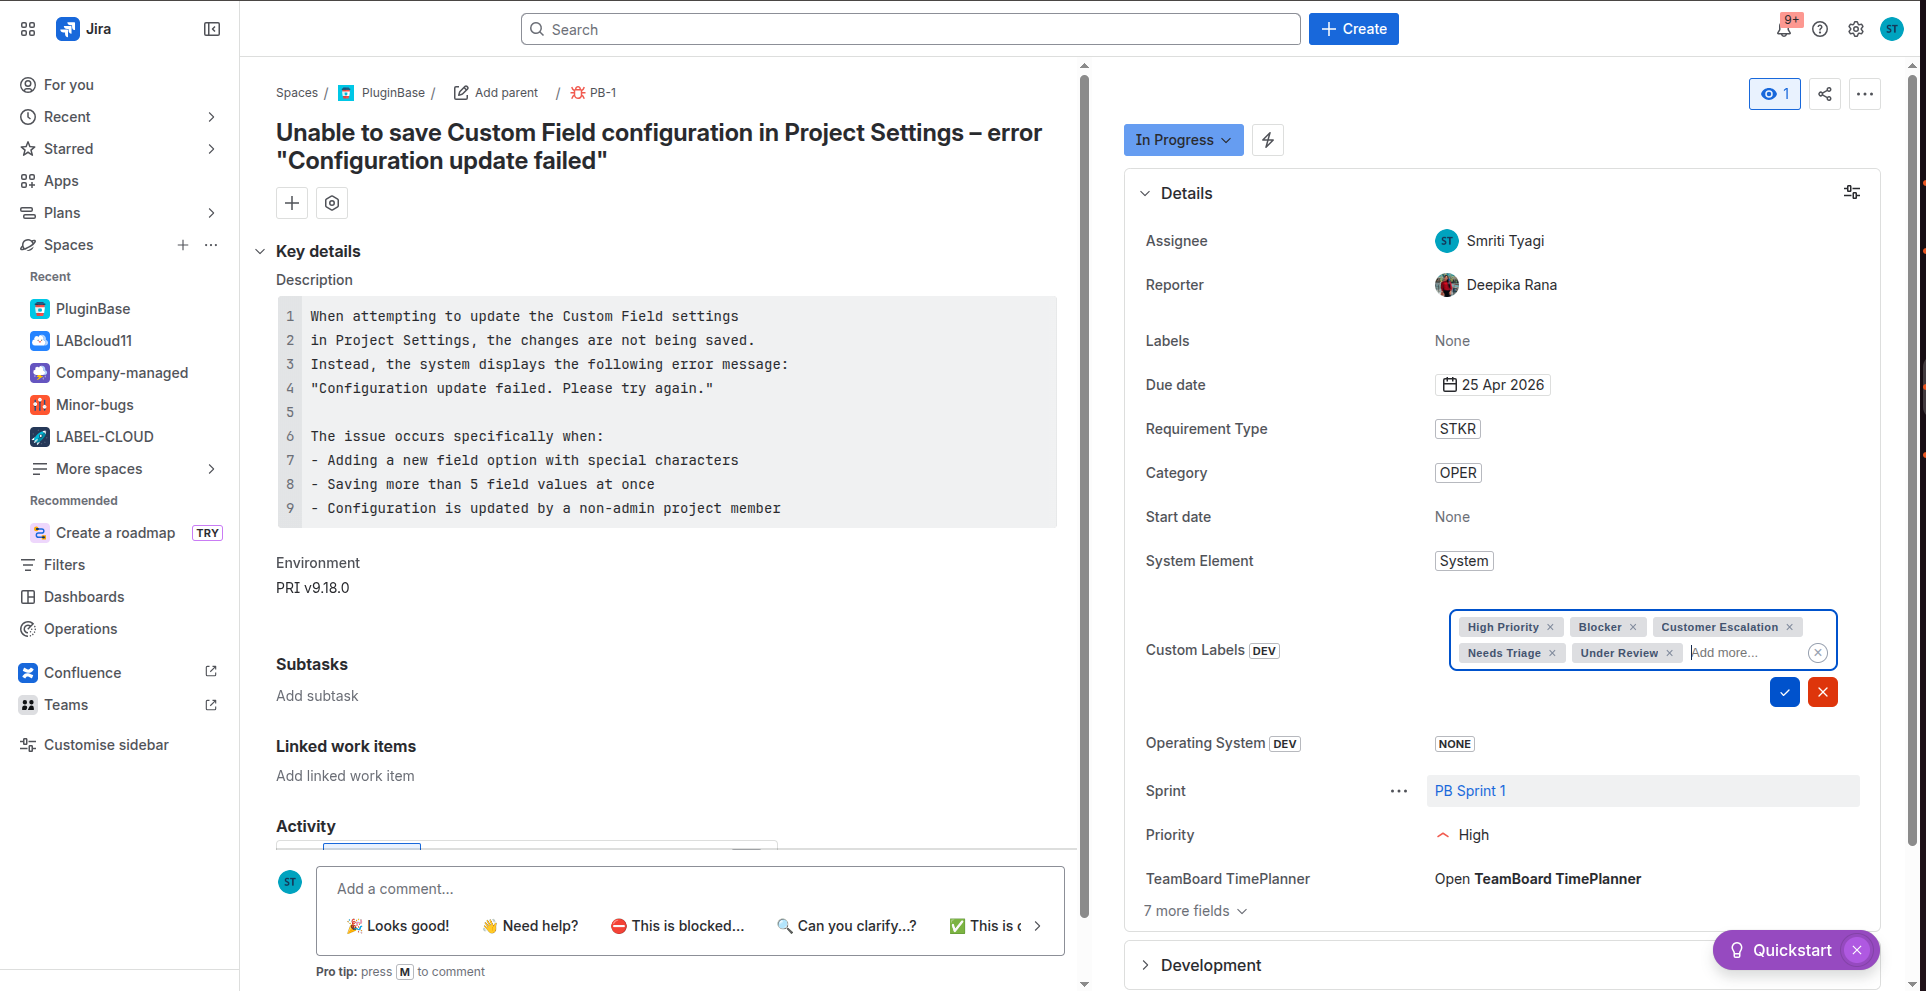
Click the field to open the edit interface.
Type 3 or more characters to trigger label suggestions from the project library.
Click a suggestion to add it. The label appears as a colored lozenge.
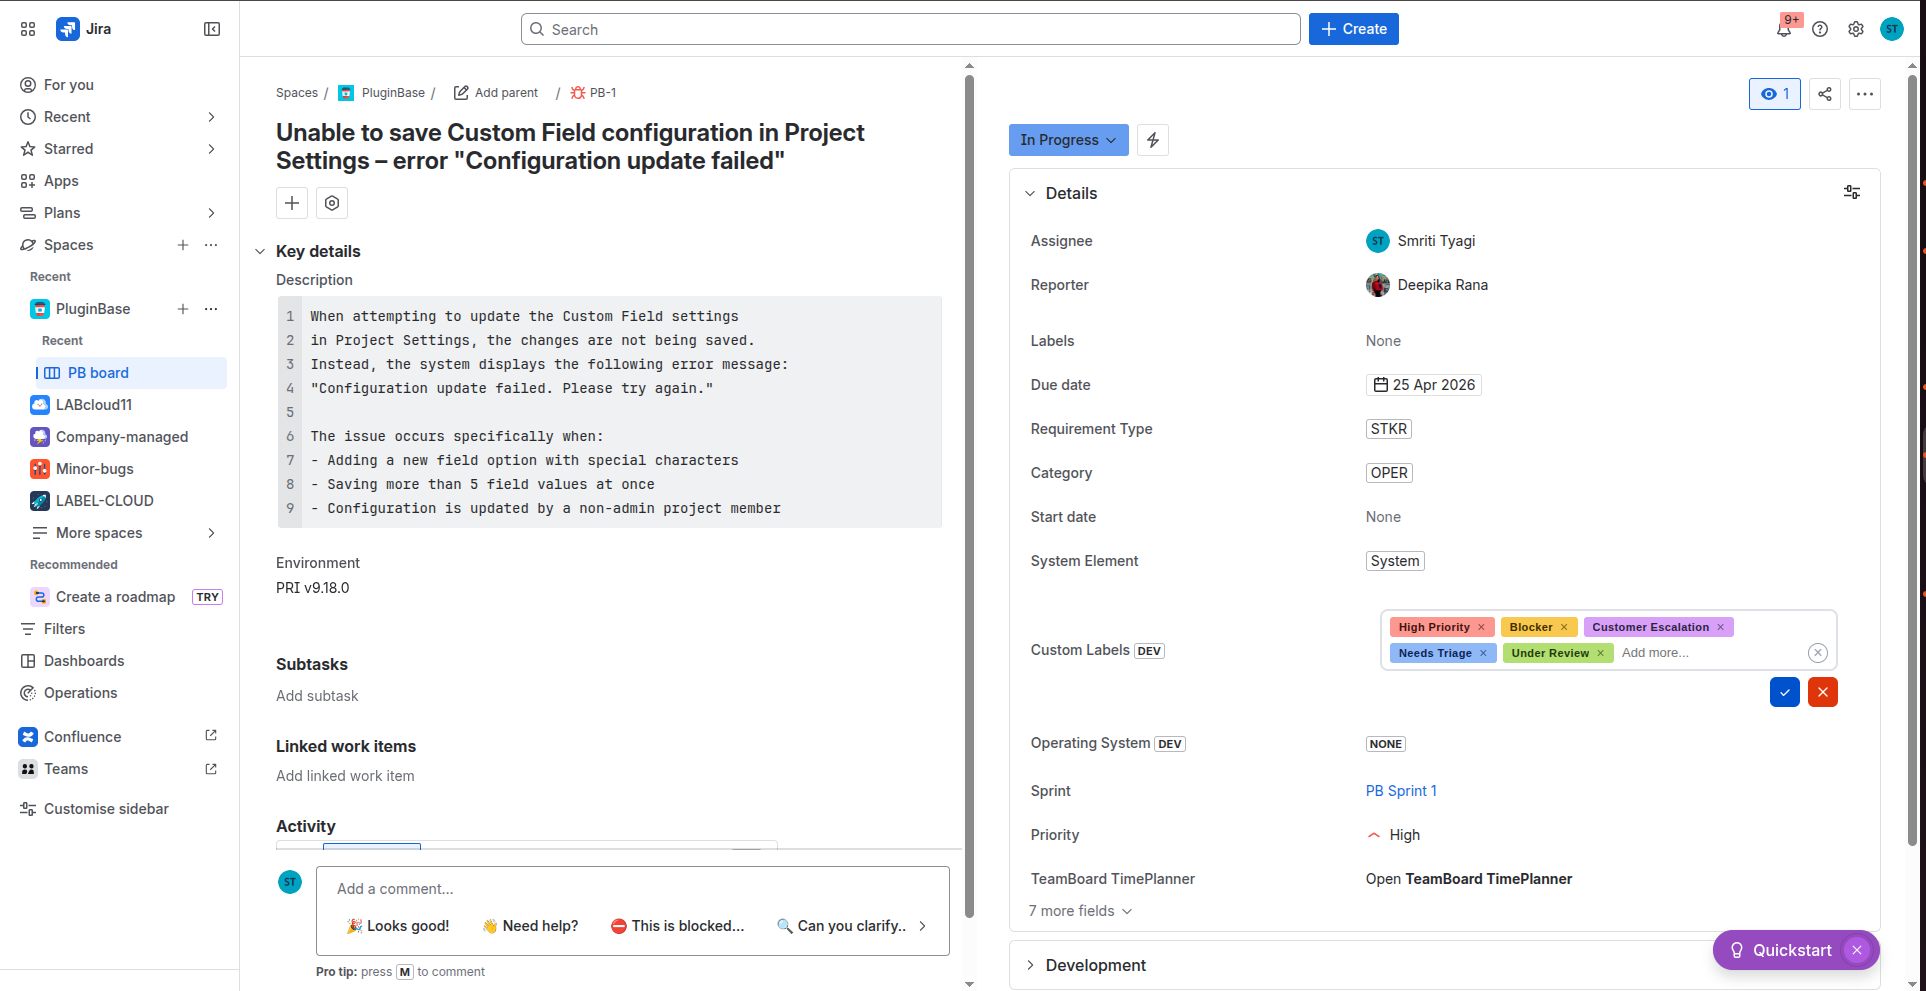
To add a label that does not yet exist, type the name and click + Create "[name]".
To remove a label, click the × on the lozenge.
Click Save (or submit the form) to persist changes.
💡 Tip: When creating an issue (not editing an existing one), labels are held in state until the issue is created. They are saved automatically when you click Create Issue.
You can update a label's color in two ways:
Option 1 – From Project Settings:
Go to Project Settings > Vamhi Labels > Custom Fields tab
Find the label in the table and click it
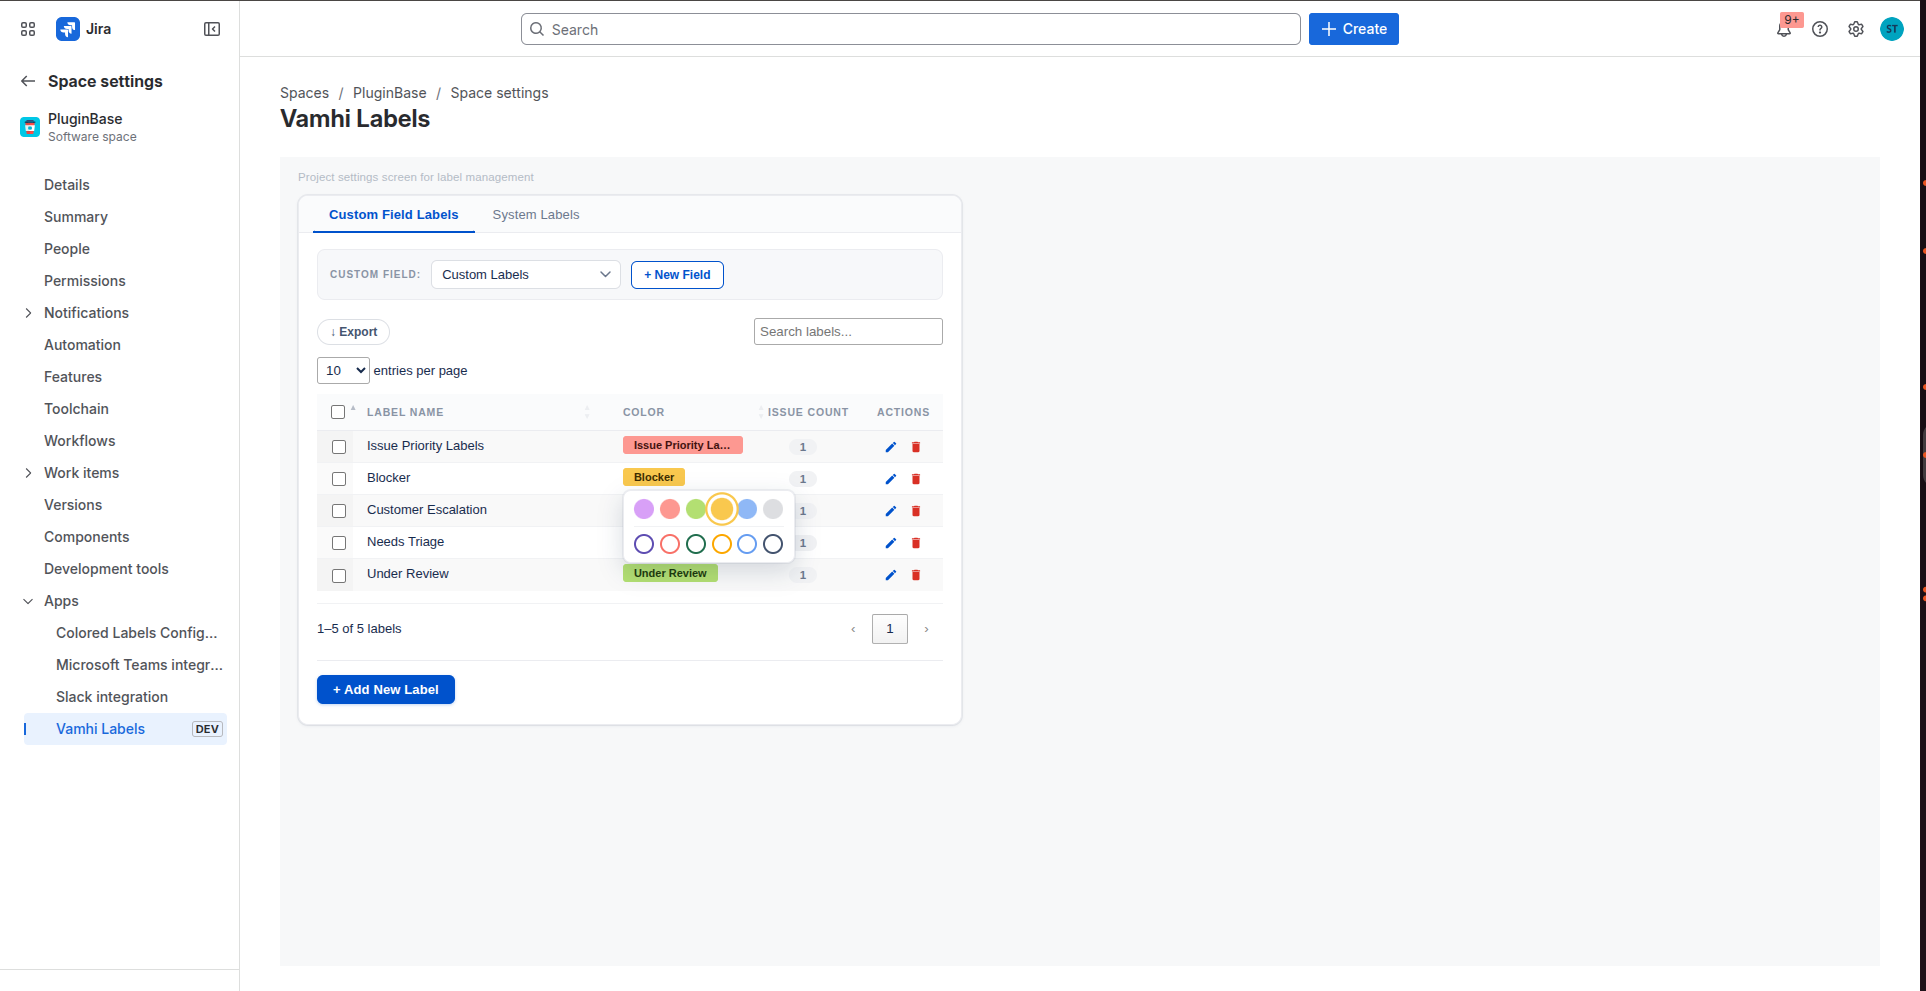
Update the name, color, or style as needed
Click Save
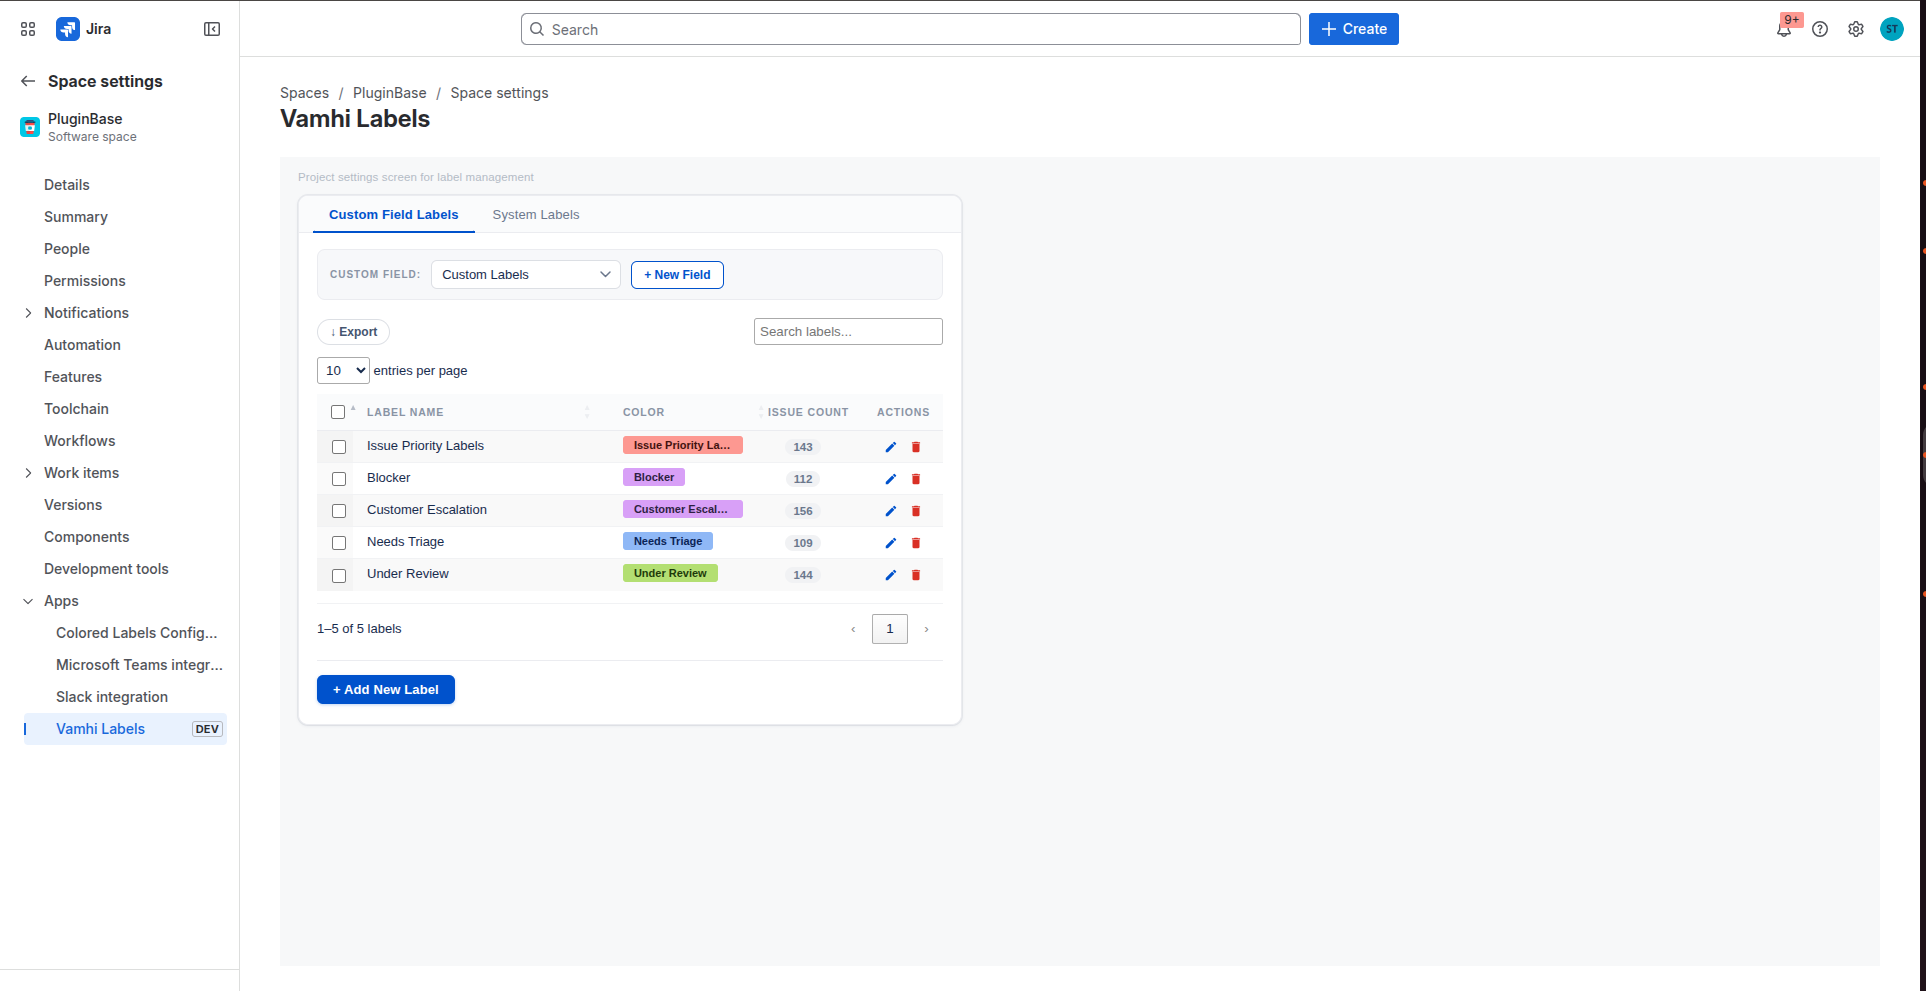
Option 2 – From the Issue edit screen:
Open any issue that has the label applied
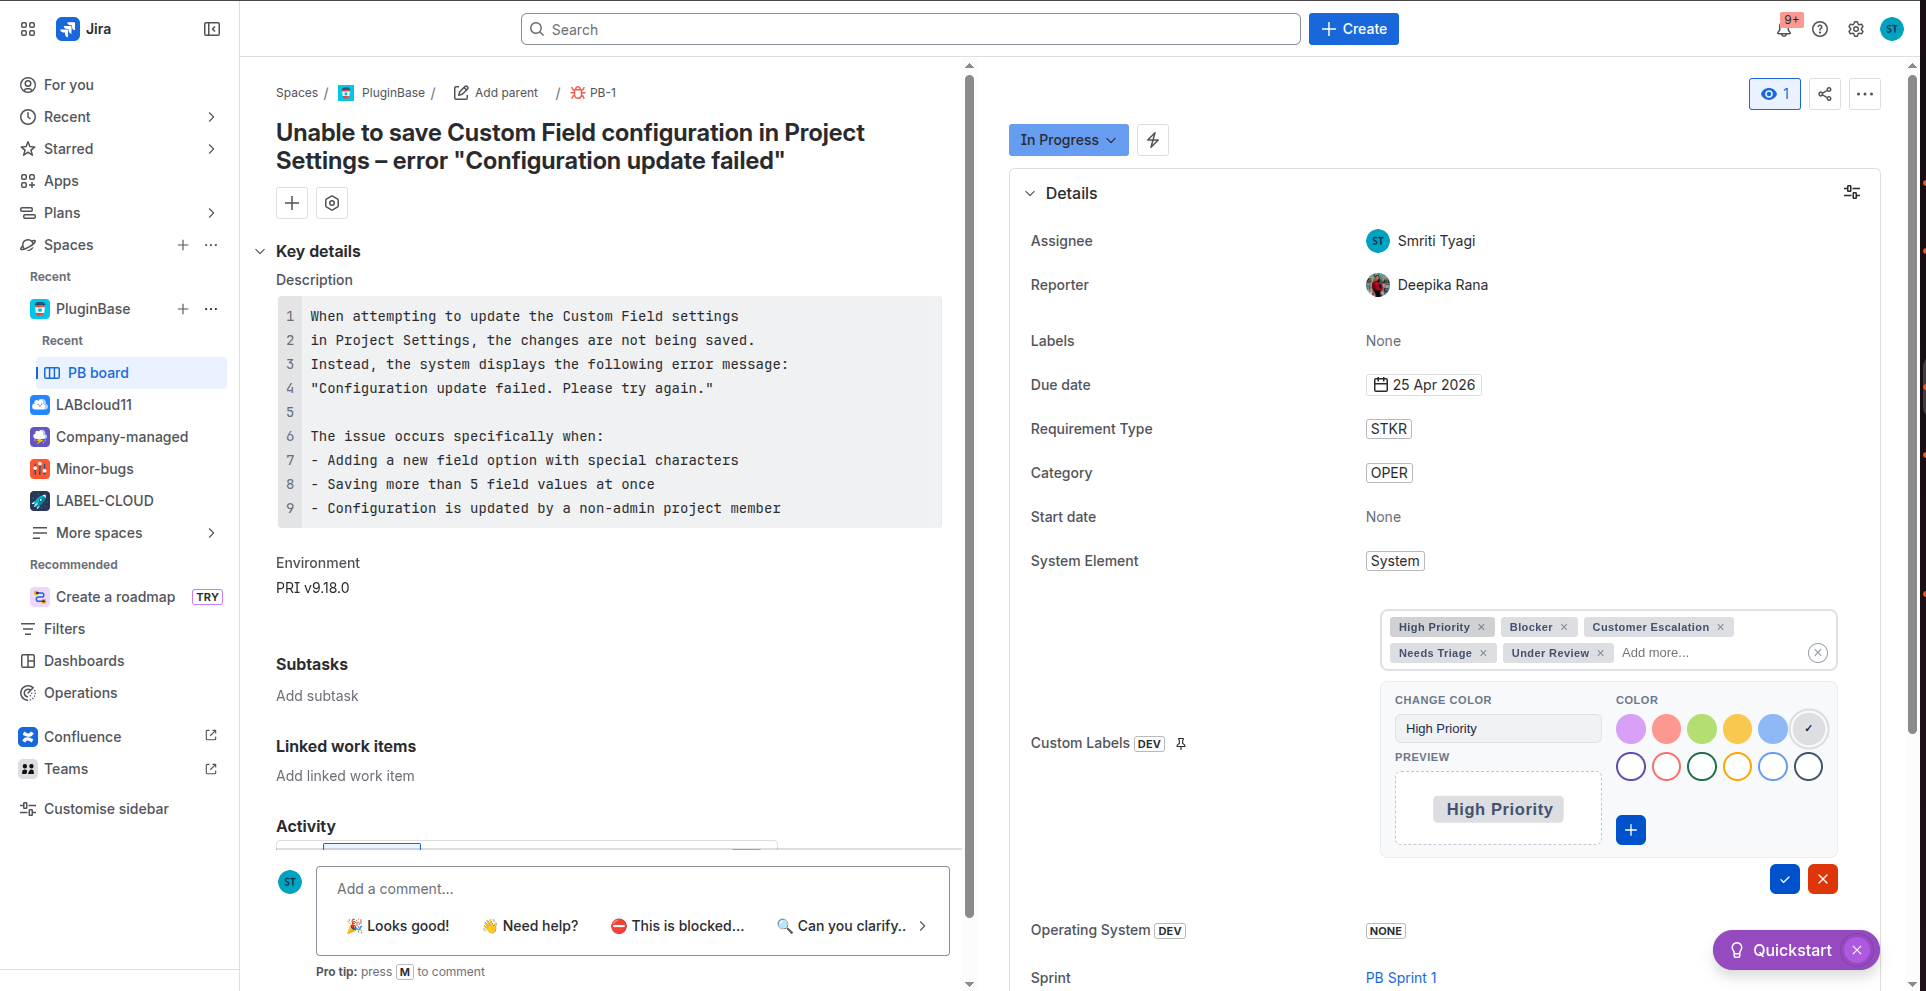
Click the label to open the edit interface
Update the color or style
Click Save
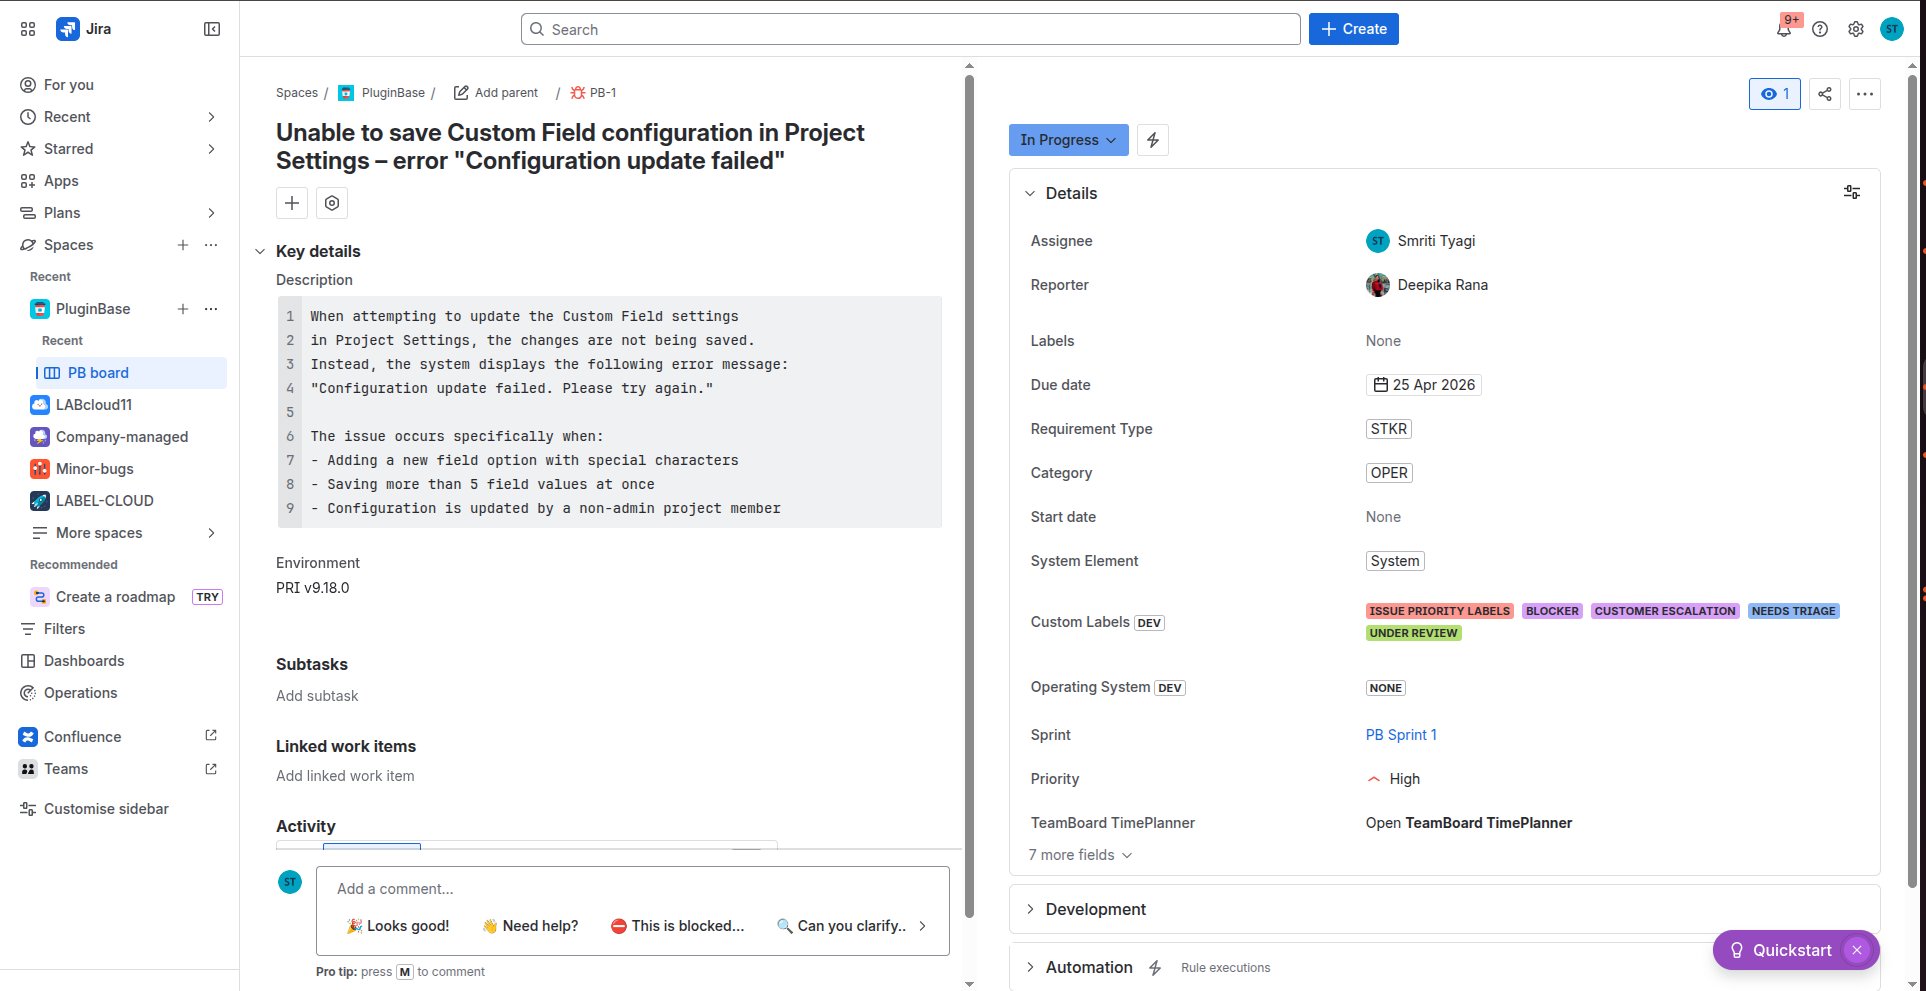
Go to Project Settings → Vamhi Labels → Custom Fields tab.
Click on Edit icon on the label you want to rename.
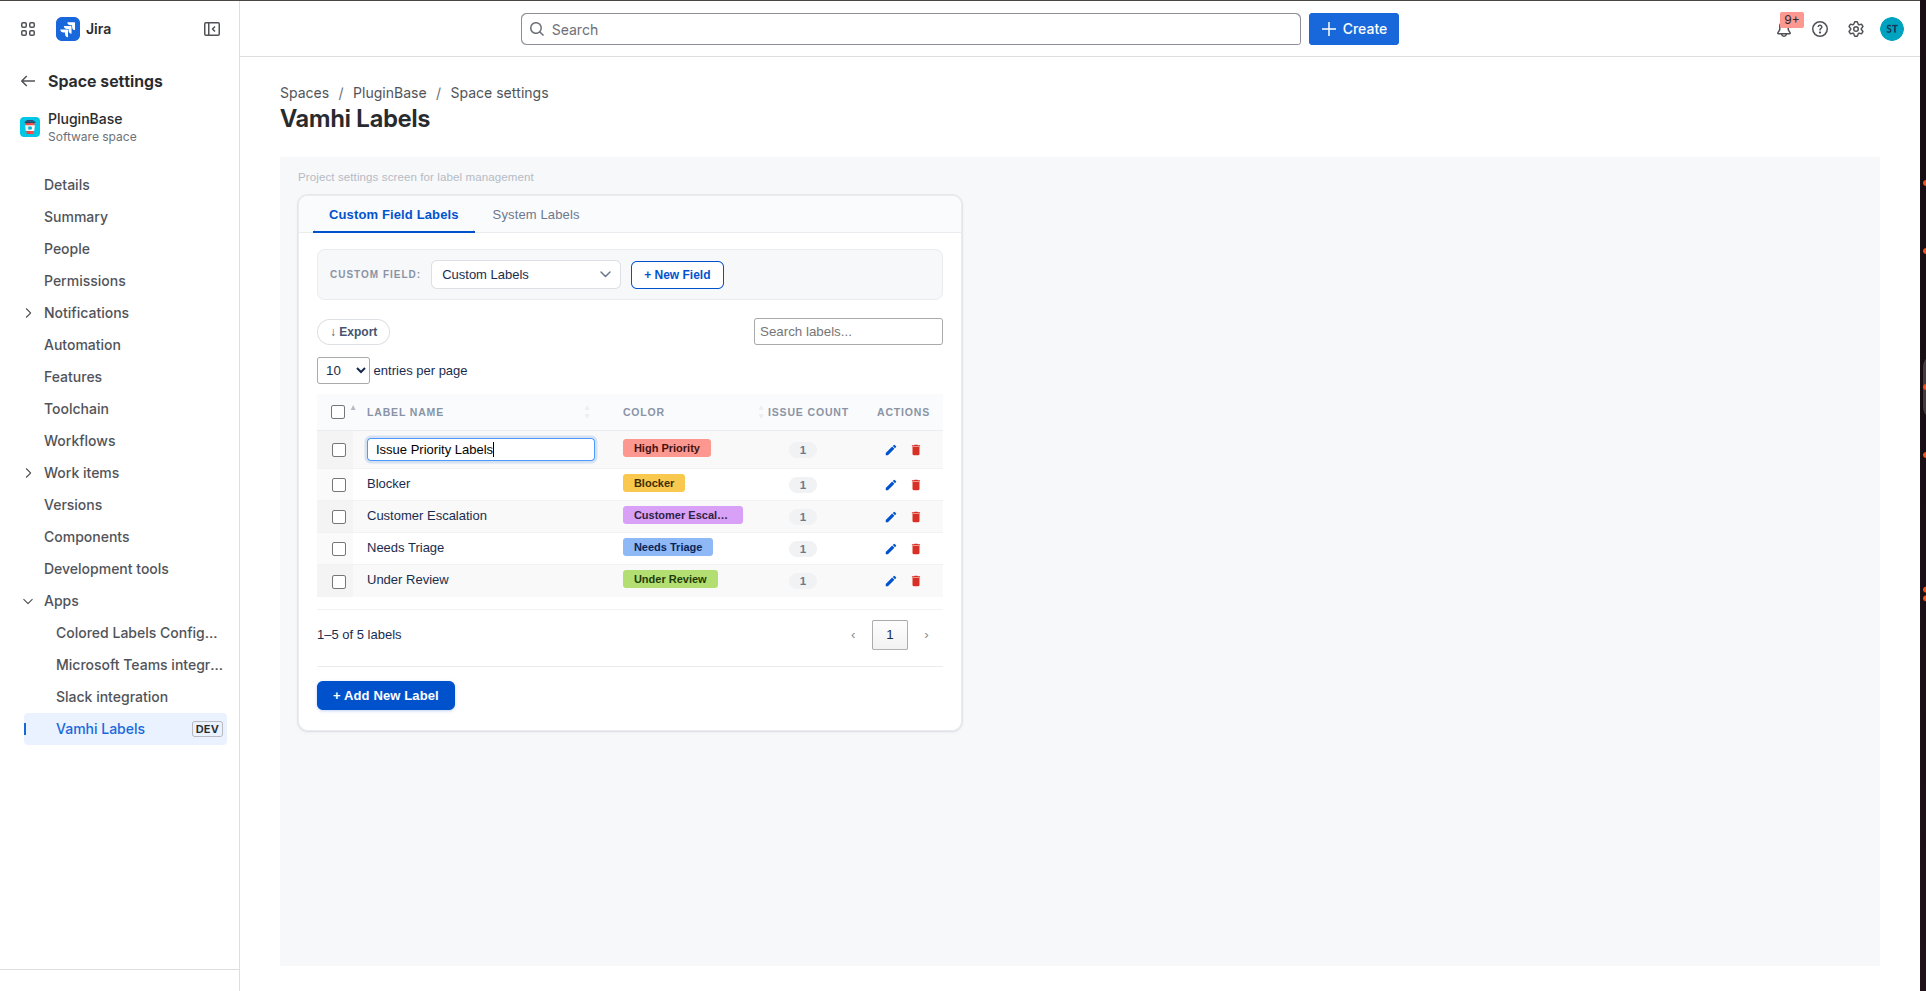
Enter the new name.
Click Save.
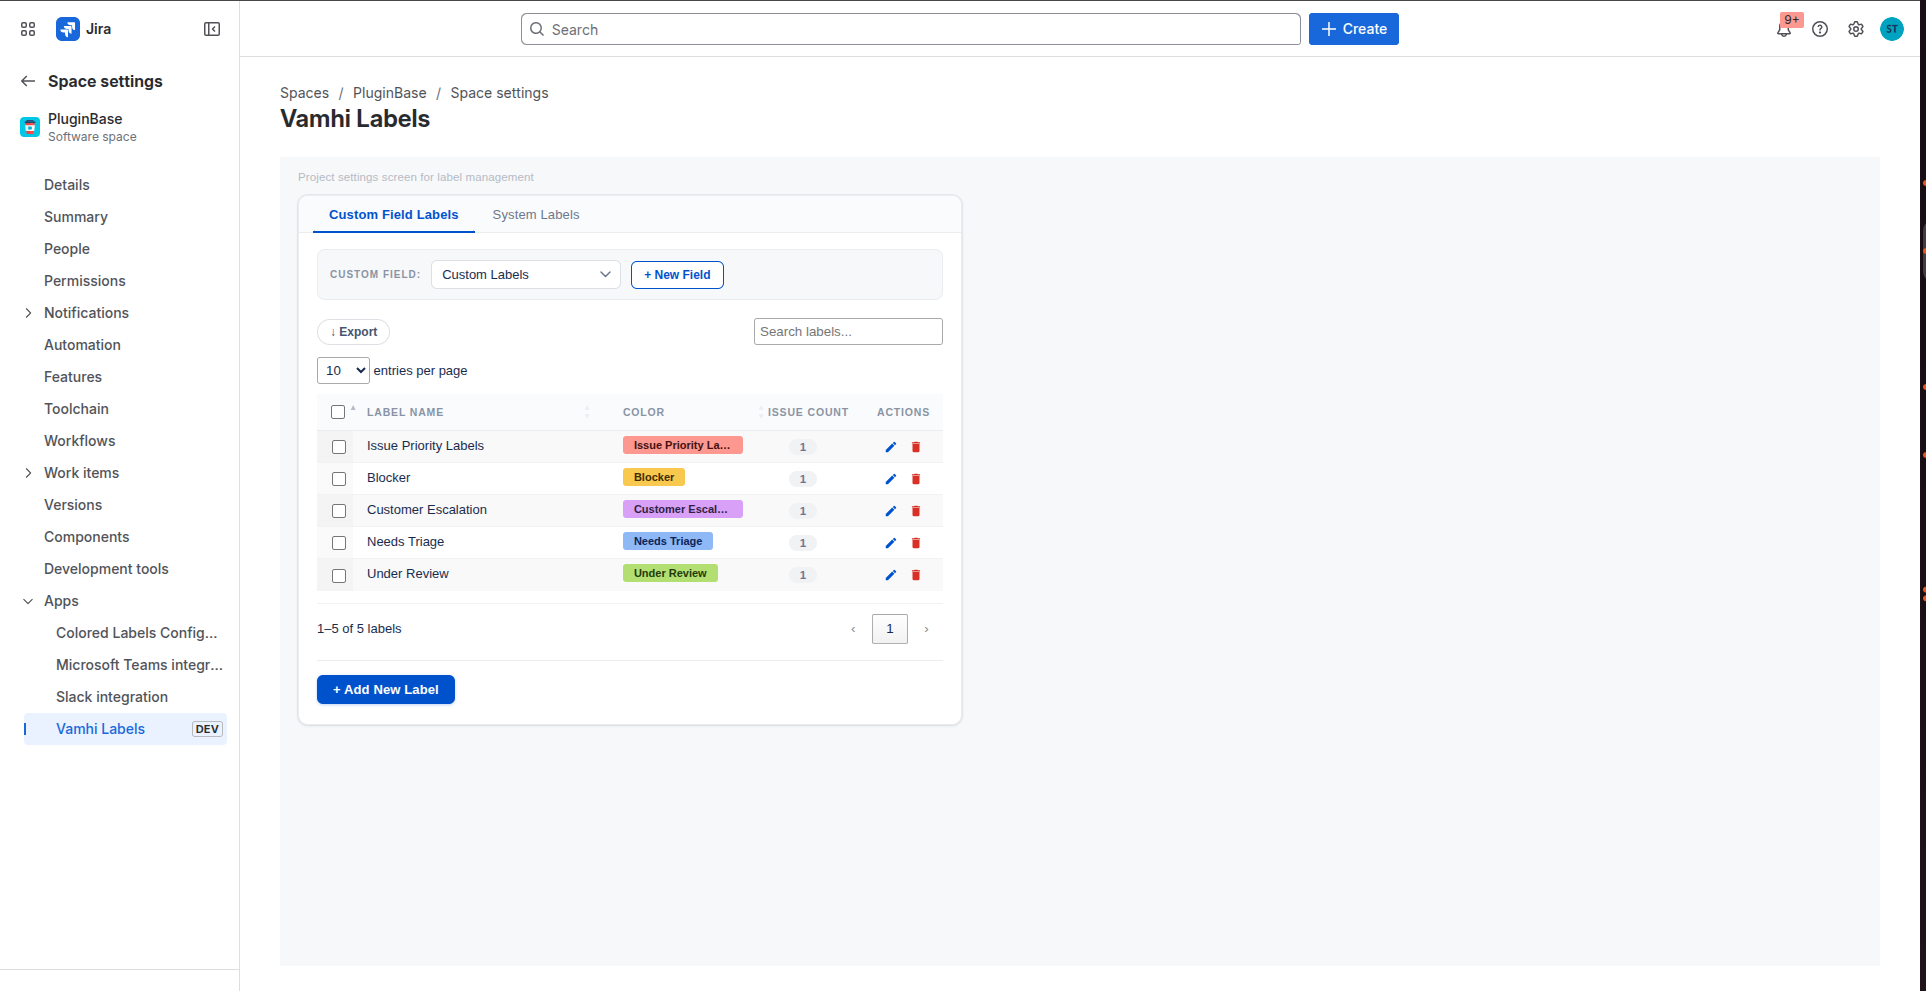
The app automatically updates the label name on all issues in the project where it was applied. No manual re-labeling is needed.
⚠️ Important: Label names are case-insensitive for uniqueness checks. You cannot create Bug and bug as separate labels.
Go to Project Settings → Vamhi Labels → Custom Fields tab.
Click Delete (trash icon) on the label.
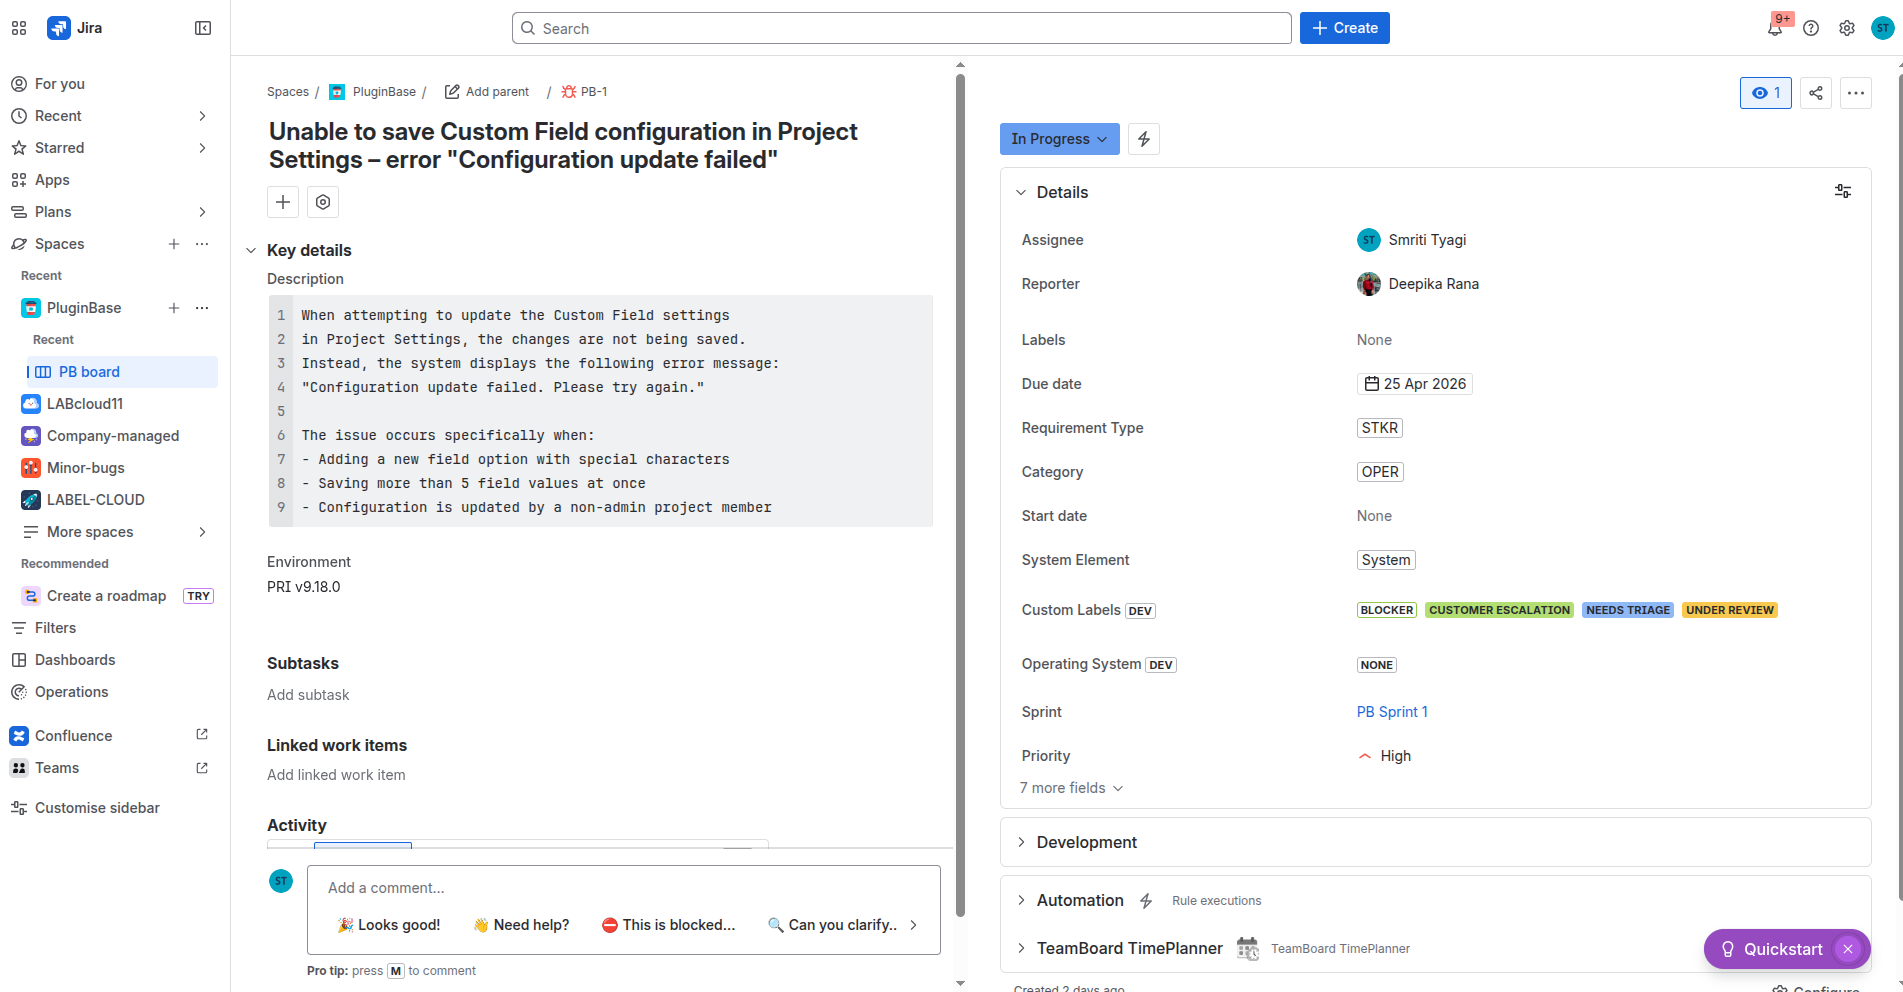
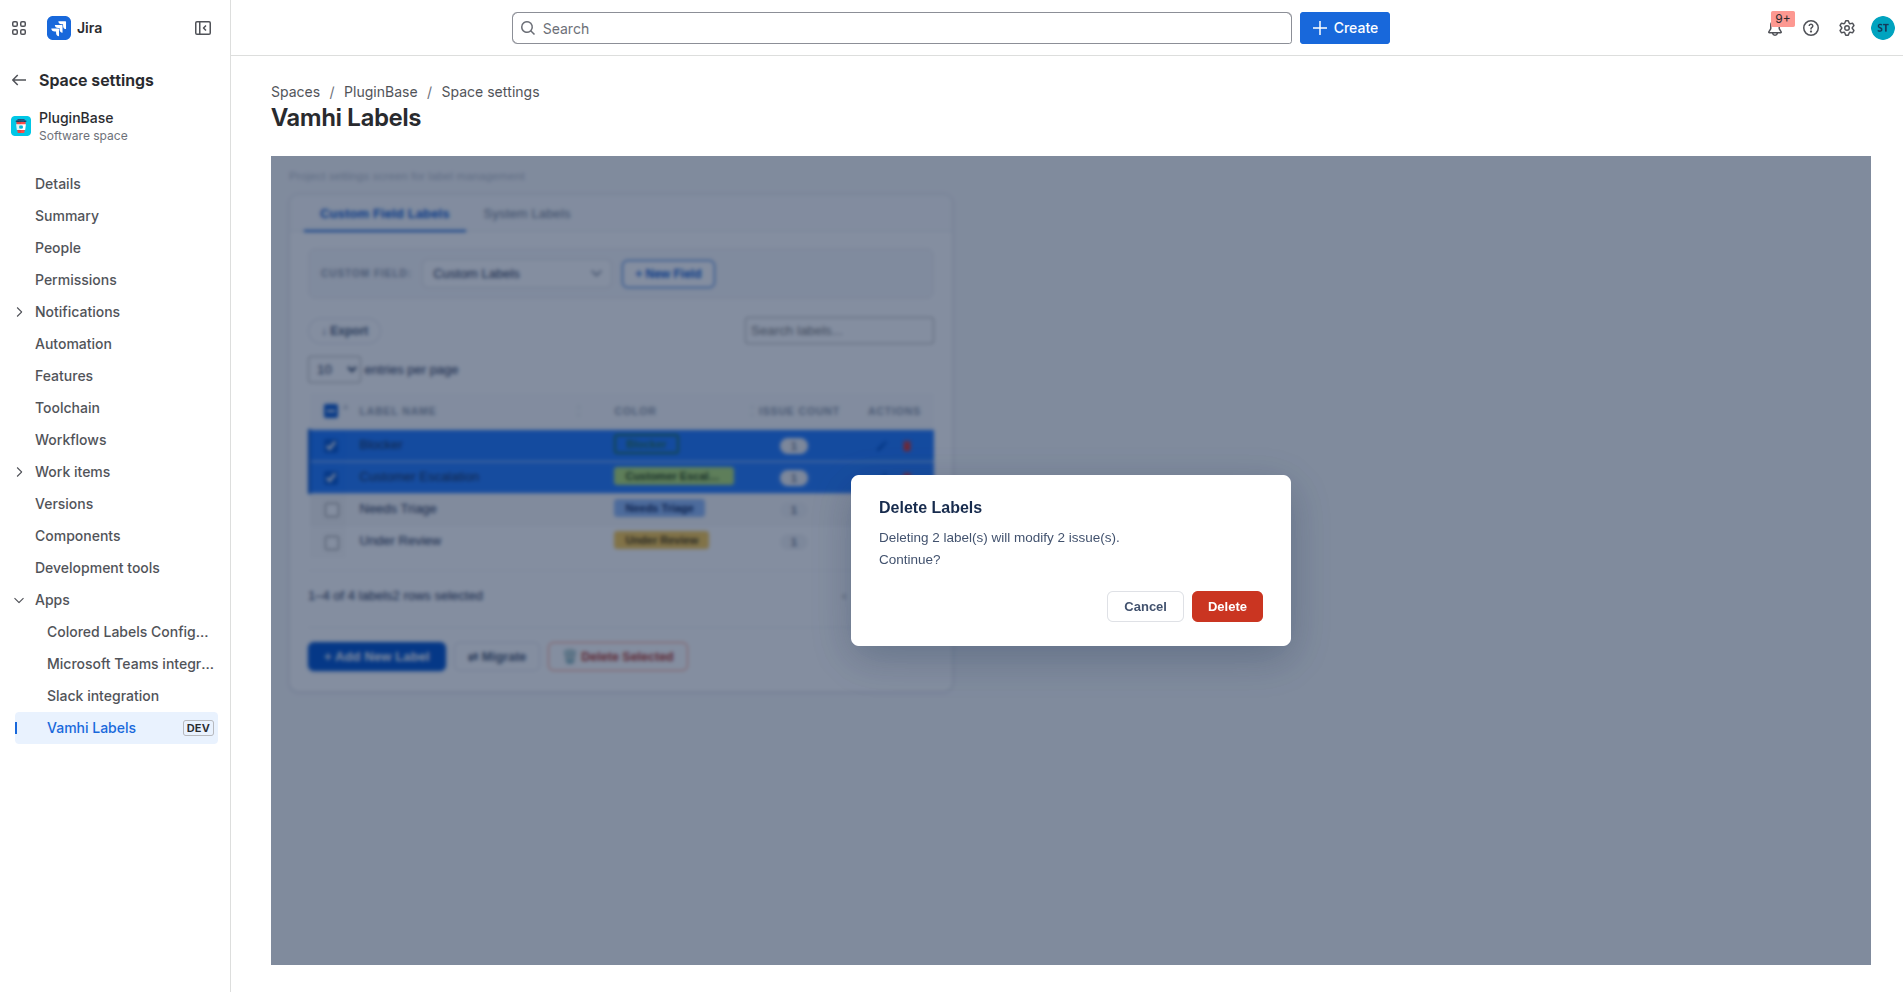
Confirm the deletion.
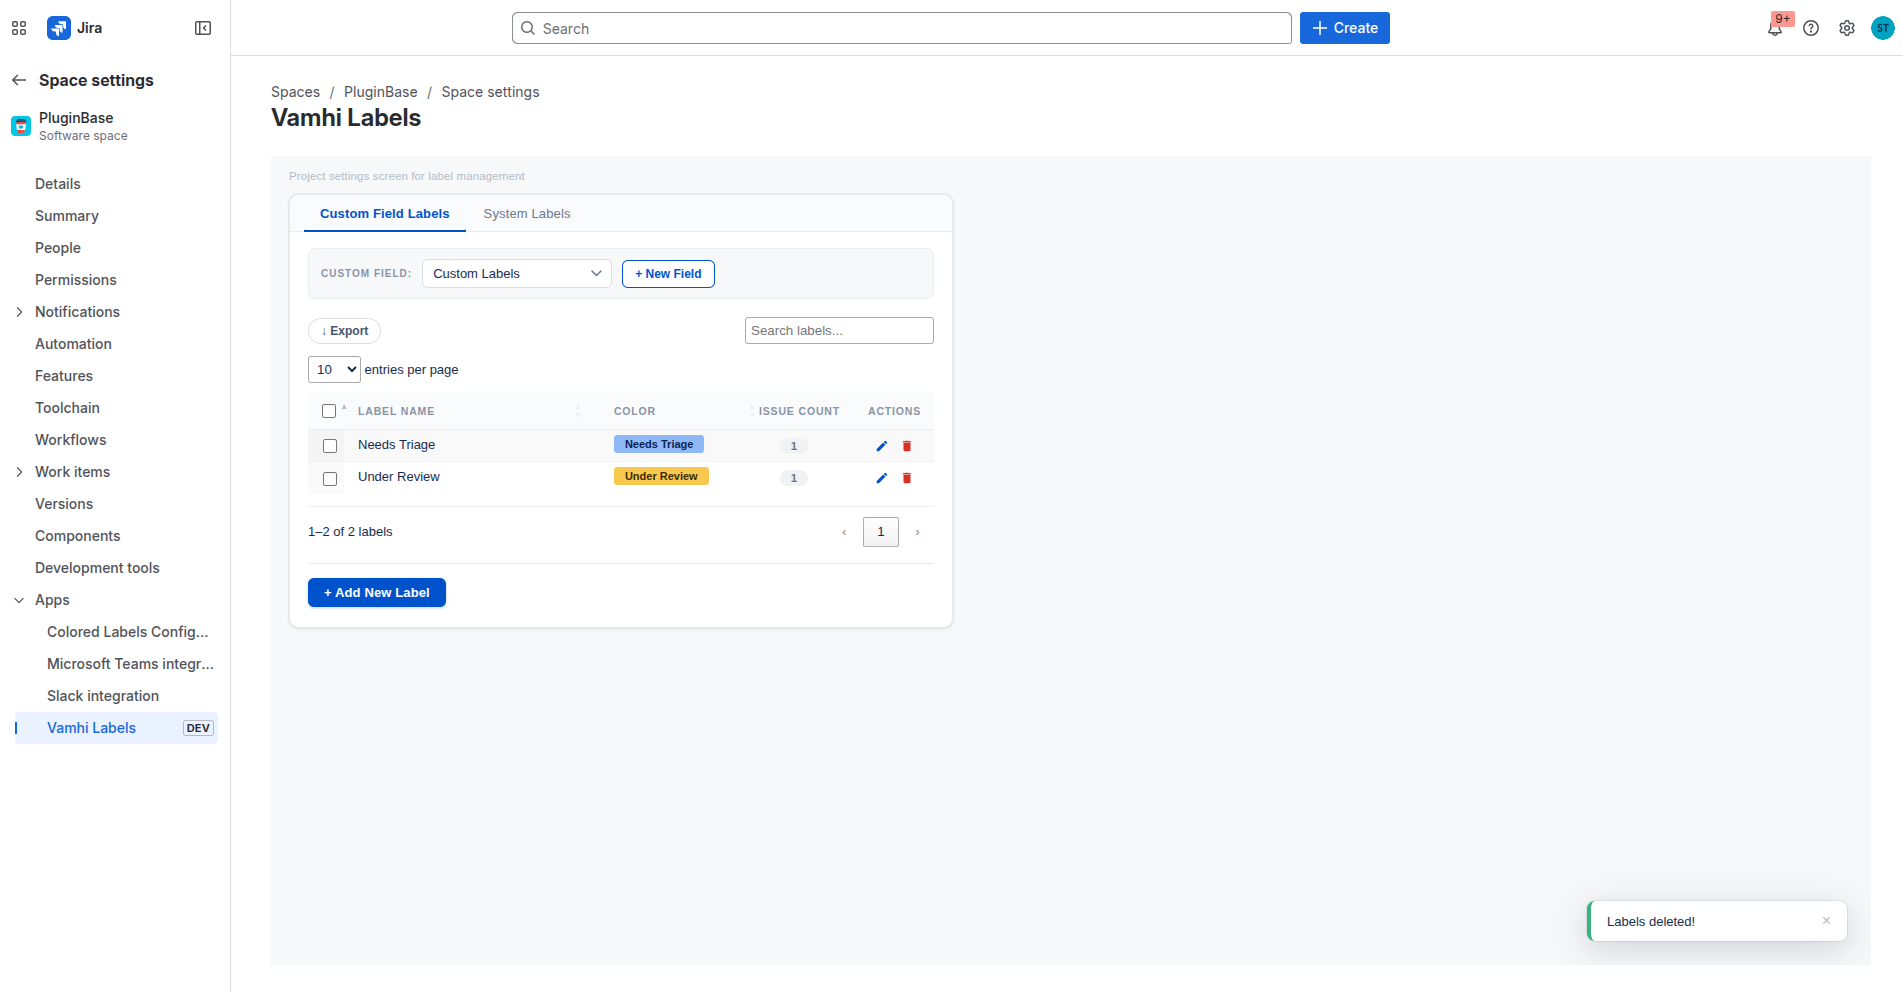
The label is removed from the project library and stripped from all issues where it was applied.
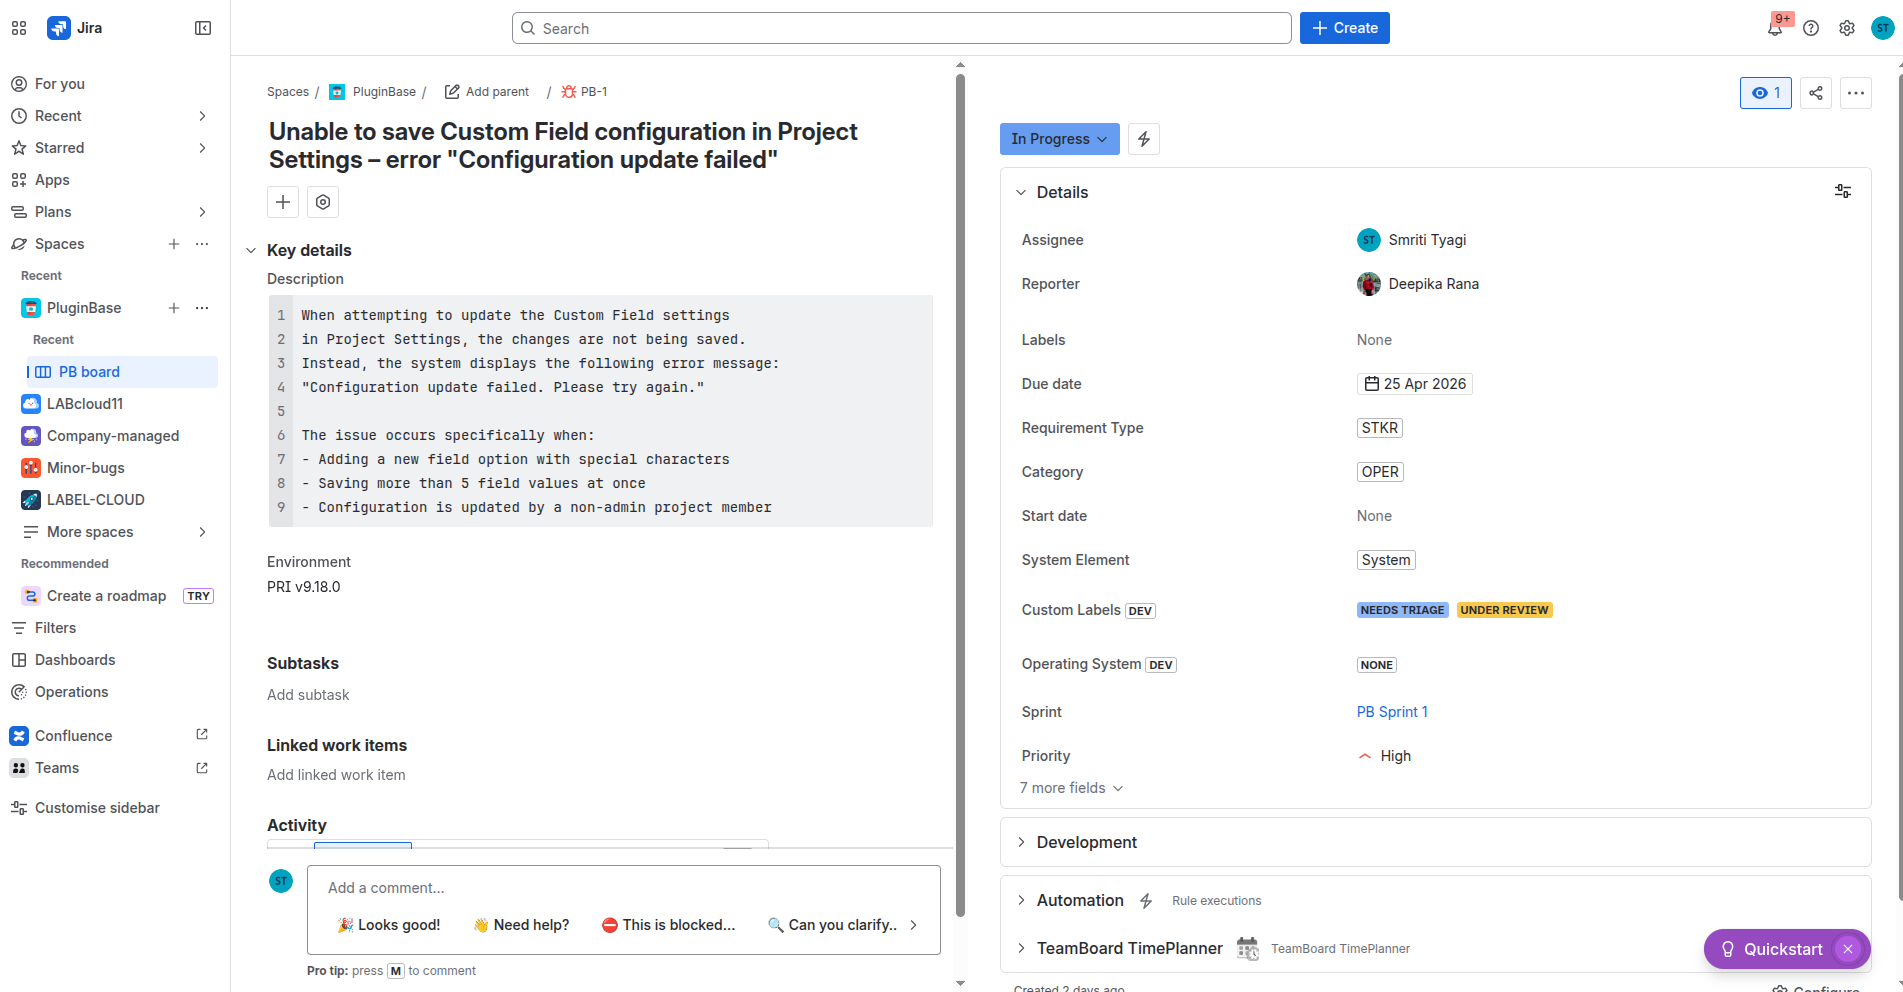
Use merge when you want to consolidate two labels into one — for example, merging bug-fix into bugfix to standardize terminology.
Go to Project Settings → Vamhi Labels → Custom Fields tab.
Click Merge on the source label (the one to be removed).
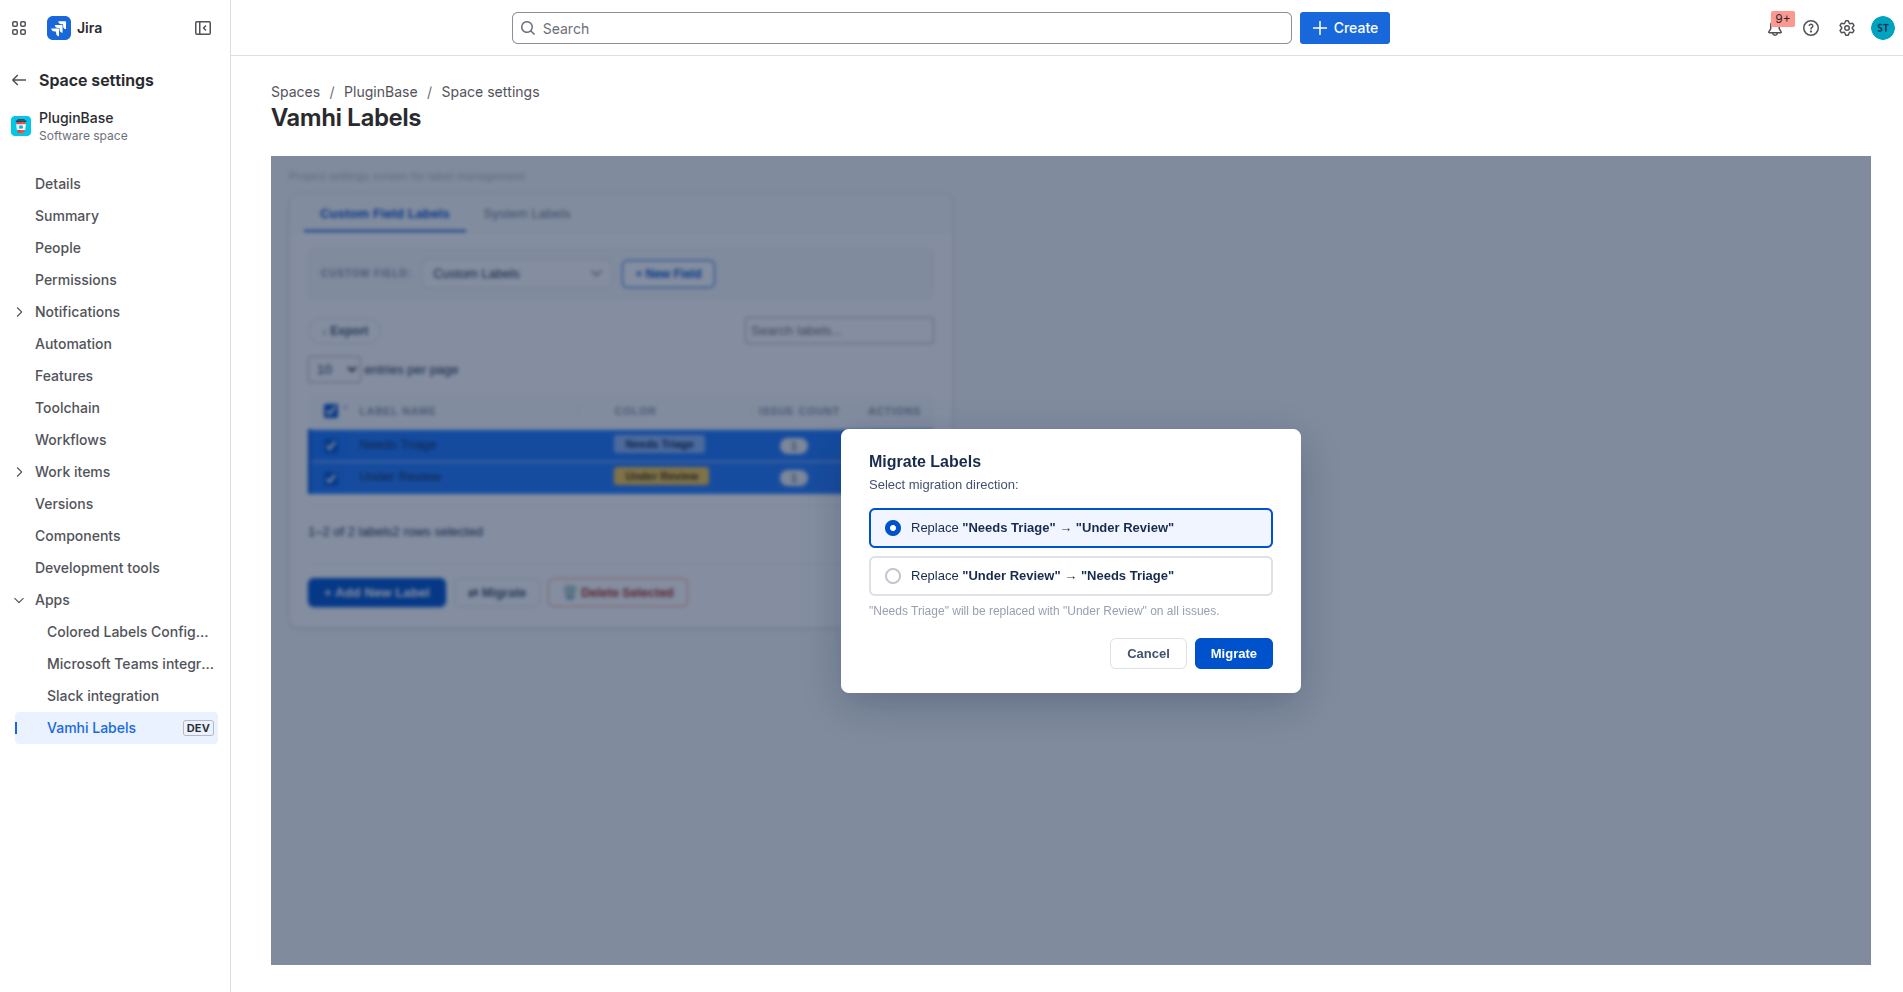
Select the target label (the one to keep) from the dropdown.
Confirm the merge.
All issues that had the source label will now have the target label instead. The source label is removed from the library.
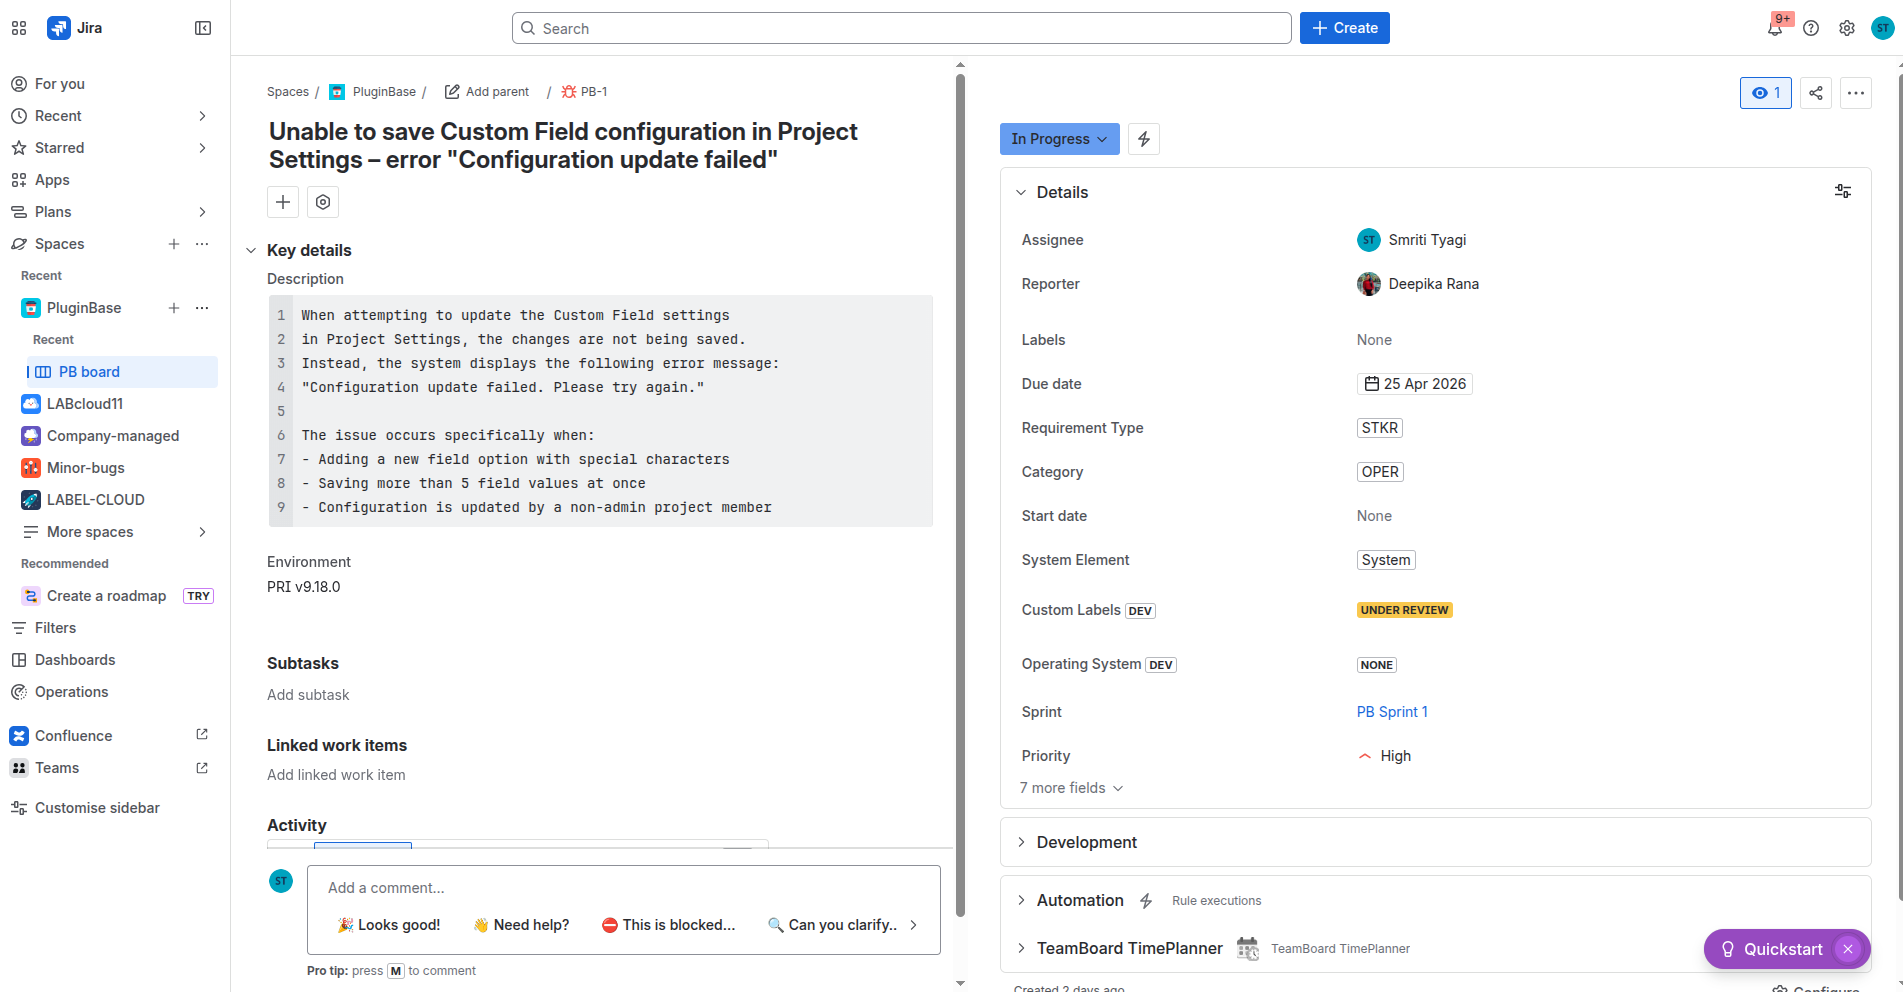
The Count column shows how many issues currently carry each label. Counts update automatically every 24 hours.
If you need an accurate count right away, check the issues manually using JQL in Jira.
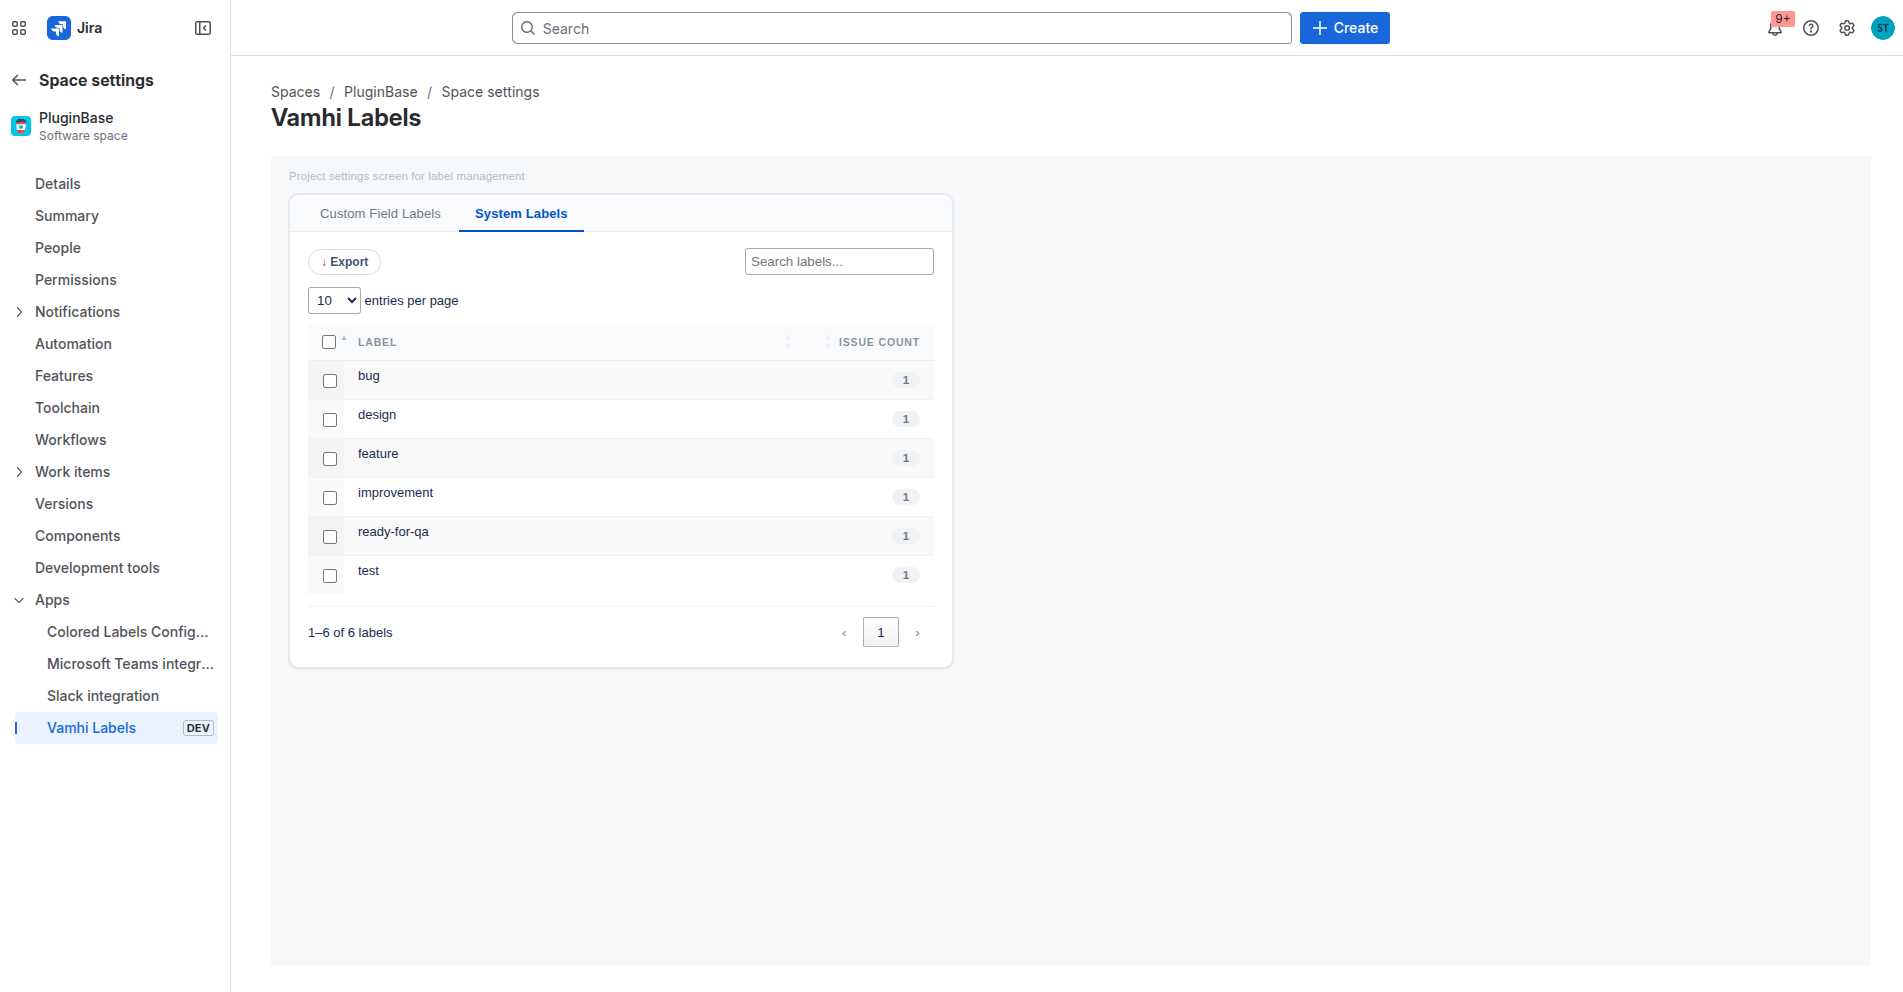
The System Labels tab in Project Settings lets you manage Jira's built-in labels field for the project — even though those labels have no color metadata.
When you open the System Labels tab, the app automatically scans all issues in the project via JQL and discovers which native labels are in use. These are shown in a table with issue counts.
Operation | What it does |
|---|---|
Rename | Updates the label name across all issues |
Delete | Removes the label from all issues |
Merge | Redirects all uses of source label to target label |
Refresh count | Re-counts issues bearing this label |
ℹ️ Note: System labels have no color or style settings — these operations only affect the label name and its association with issues.
Colors can be applied in two styles — Solid (filled) and Light (outlined).
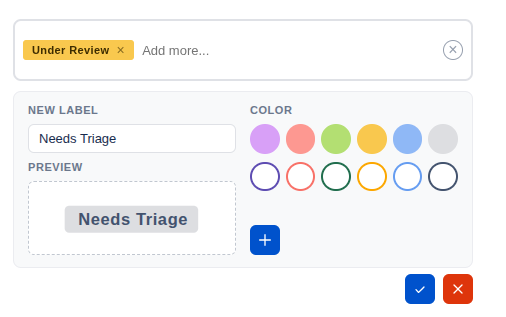
Style | 1 | 2 | 3 | 4 | 5 | 6 |
|---|---|---|---|---|---|---|
Solid | Purple | Red | Green | Yellow | Blue | Gray |
Light | Light Purple | Light Red | Light Green | Light Yellow | Light Blue | Light Black |
💡 Tip: Use solid styles for high-visibility, high-priority labels. Use light styles for secondary classifications that should be visually quieter.
Use kebab-case for multi-word labels (e.g., needs-review, tech-debt) for consistency and easier JQL filtering.
Avoid special characters other than hyphens — they can interfere with search.
Keep names short (under 30 characters) so lozenges display cleanly in issue views.
Assign one color per team or functional area so labels are instantly recognizable. For example: red = bugs, blue = platform, green = growth.
Reserve solid red for urgent/blocker labels and solid gray for low-priority or archived labels.
Avoid too many similar colors — if two labels look nearly identical, viewers won't distinguish them quickly.
When cleaning up label , always consider merging before deleting. Merging preserves issue history under the target label; deleting permanently removes the classification from all issues.
If your team classifies issues along multiple dimensions (e.g., team ownership AND feature area), create separate custom field instances for each dimension rather than cramming all classifications into one field. This keeps each field's label library focused and manageable.
Cause: The Label App license is not active (expired or not yet licensed).
Resolution:
Go to Jira Settings → Apps → Manage apps → find Vamhi Label.
Check the license status.
Renew or purchase a license from the Atlassian Marketplace.
Once the license is active, color changes will save normally.
Cause: Autocomplete requires at least 3 characters before suggestions appear, and only shows labels from the current project's library.
Resolution:
Type at least 3 characters.
If the label exists in another project but not this one, a Project Admin must create it in this project's settings, or the user can type the full name and use + Create "[name]" to add it on the fly.
Cause: Issue counts are not updated in real time. They refresh automatically every 24 hours.
Resolution:
Wait for the count to auto-refresh — it updates on its own within 24 hours.
If you need an accurate count right away, check the issues manually using JQL in Jira.
Cause: You are not a Project Admin or Jira Administrator on this project.
Resolution:
Ask your Jira Administrator to grant you Administer Project permission for the project.
Or have a Project Admin make the settings changes on your behalf.
Cause: The app only tracks labels through its own database after installation. Issues labeled before the app's custom field was added may not have their labels visible in the Vamhi field.
Resolution:
This is expected behavior — the Vamhi label field is separate from any pre-existing label data.
For system (native) labels, open the System Labels tab and let the auto-sync run; it will discover all existing native labels.
Cause: The label was created without an active license, or a user applied a label whose color metadata could not be resolved.
Resolution: Once a valid license is active, a Project Admin can assign the correct color either from:
Project Settings > Vamhi Labels > Edit the label, or
Issue edit screen > click the label > update the color
Q: Can I use Vamhi Label Cloud on Jira Server or Data Center?
A: No. Vamhi Label Cloud is a Jira Cloud app built on the Atlassian Forge platform. It is not available for Server or Data Center deployments.
Q: Can I have different label colors for the same label name in different projects?
A: Yes. The label library is per-project per-field. A label named bug can be red in Project A and orange in Project B — they are independent entries.
Q: What happens to labels on an issue if I delete the custom field from the project screen?
A: The underlying data in Jira's custom field is preserved, but the Vamhi field UI will no longer appear on issues. If the field is re-added to the screen later, existing label assignments will be visible again.
Q: Can I search for issues by their Vamhi label using JQL?
A: Yes. Use the field ID in JQL: cf[XXXXX] = "label-name" cf[XXXXX] IN ("label-a", "label-b") Replace XXXXX with the numeric custom field ID. You can find the field ID in Jira Settings → Issues → Custom Fields.
Q: Does Label App affect Jira's native labels field?
A: Only through the System Labels tab in Project Settings, which lets admins rename/merge/delete native labels. The colored label feature uses a separate custom field (Vamhi Colored Labels (Multi-select)) and does not modify Jira's built-in label field.
Q: Can a user create new labels from the issue edit screen without going to Project Settings?
A: Yes. Any user with Edit Issues permission can type a new label name in the edit field and select + Create "[name]". The label is added to the project library instantly.